I hope to inspire and entertain you with a lot of sewing and a little of everything else!

Tuesday, November 12, 2013

Re-enacting Wardrobe: Civil War Gathered Bodice


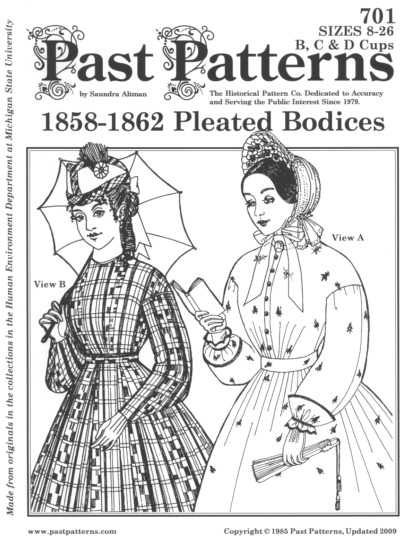
I finished my Civil War Bodice! OK, I do still need to hem the sleeves, but I really love the way it turned out! I used 100% cotton from Walmart. At only $3/yd, the bodice and skirt fabric only cost $27. I used Past Patterns #701 and it lived up to all the great reviews I've read. I shortened the bodice per recommendations and I think I could have left it. The waist is supposed to be high and it is.

 I did have to call Saundra once for technical support to figure out the front closures, but she helped me get it right and they look so neat! Here you can see the front edges turned back:
Here is a close-up of some of the 14 hand-stitched hooks and eyes:
 I decided to make the "coat sleeves" which are a very typical sleeve of the 1860s. They look a bit strange laid flat, but they give a pretty rounded silhouette when worn. I've seen them called "hand-shaking" sleeves because your arms naturally take that position.
I will get modeled pictures soon, but I didn't want to take the time to get all "corseted" and I don't have someone here to take pictures right now. I have to make Civil War Gowns for Rosie and Katie, too- and all before December 21, when the whole family is attending Fezziwig's Ball!! I have a bolt of blue "silk" that will be Rosie's gown and I'm also working on Andy's Christmas outfit for pictures on November 24. Busy, busy! What are you working on? Please leave a comment so I know someone is still reading!!

Tuesday, November 5, 2013

Biggest Project Ever: Chicken Tent!!

If you have been reading for awhile, you know I like to do some odd craft projects. Remember my leather baby shoes? And my recent corsetry work? Well, today's project may be even stranger. My 3 little chickies have a very basic wooden coop. I'm not sure it's great for a cold, snowy winter, so I decided to make a lean-to tent to protect it!
I was thrilled to find Sunbrella fabric at a discount store for $5/yd. I got a total of 10 yards in various pieces and it was just enough. Stitching such a large, cumbersome piece was difficult.
I used flat-felled seams for strength and I added a large vinyl skylight.
My Dad installed it this morning. It is attached to a header board which is screwed into the board over the back garage door.
Here's a view from the other side. The corner of the house is next to the tent. The side looks wavy because I have it pulled up to let the chickens enter their run. The hay bale is keeping them from escaping.

Here's a look from inside the garage. The tent is 4 feet wide and about 5 feet deep. The skylight works perfectly! I think the sloped roof will work well to let snow run off.
This picture shows where I moved the tent fabric to let them get to their run. I have to figure something out over there. Tent stakes hold the tent down at all the corners, so it is quite secure.

What do the chickens have to say??
Bennie: I love my new tent. It is so warm and cozy and keeps out the wind!
Shelly: Ooooh, sunflower seeds in a warm garage...yum!
Blackie: This will do for now, but I hope you're planning to build us a bigger coop in the spring!

I'm working on my Civil War Dress, so I hope to be back with progress soon. I am really glad to have the Chicken Tent Done!!

Saturday, November 2, 2013

Happy Halloween...and on to Thanksgiving!

Hope you had a Happy Halloween! We sure did, despite rainy Trick-or-Treating! I hoped to post sooner, but the past week has been CRAZY! Ear infections, Halloween parties, parades at school, 3 teens having friends over for Halloween, costumes, a dislocated toddler elbow, friends and playdates and lots of CANDY! I have been flat-out, but it has been FUN!!
I think I might have shared this quilt before, but maybe some of you missed it, so here it is again! Before I had Andy, I went on weekend stitching retreats with my Quilt Guild. One Fall, this was the project I brought. I think it's from an old McCall's Quick Quilts magazine. The ghosts are made from hankies and the orange and purple are pockets to hold Halloween candy.
I hang it by our front door each Fall and it's one of my favorite seasonal decorations. It was fun to make, too!
This is the pumpkin Rosie carved! It's done by shaving the pumpkin skin and carving a face. The pumpkin she picked was super-lopsided, which worked perfectly for this. I think she did a great job!
Parting shot: some of our Halloween Goody Bags. These are a Martha Stewart Kit. I love her kits: they always look so nice.

Well, I have been sewing, believe it or not. And knitting. I will have a cool "Chicken Awning" and "Civil War Knitted Cap" to share soon!
pinterest-dffa4.html